Maple Syrup 101

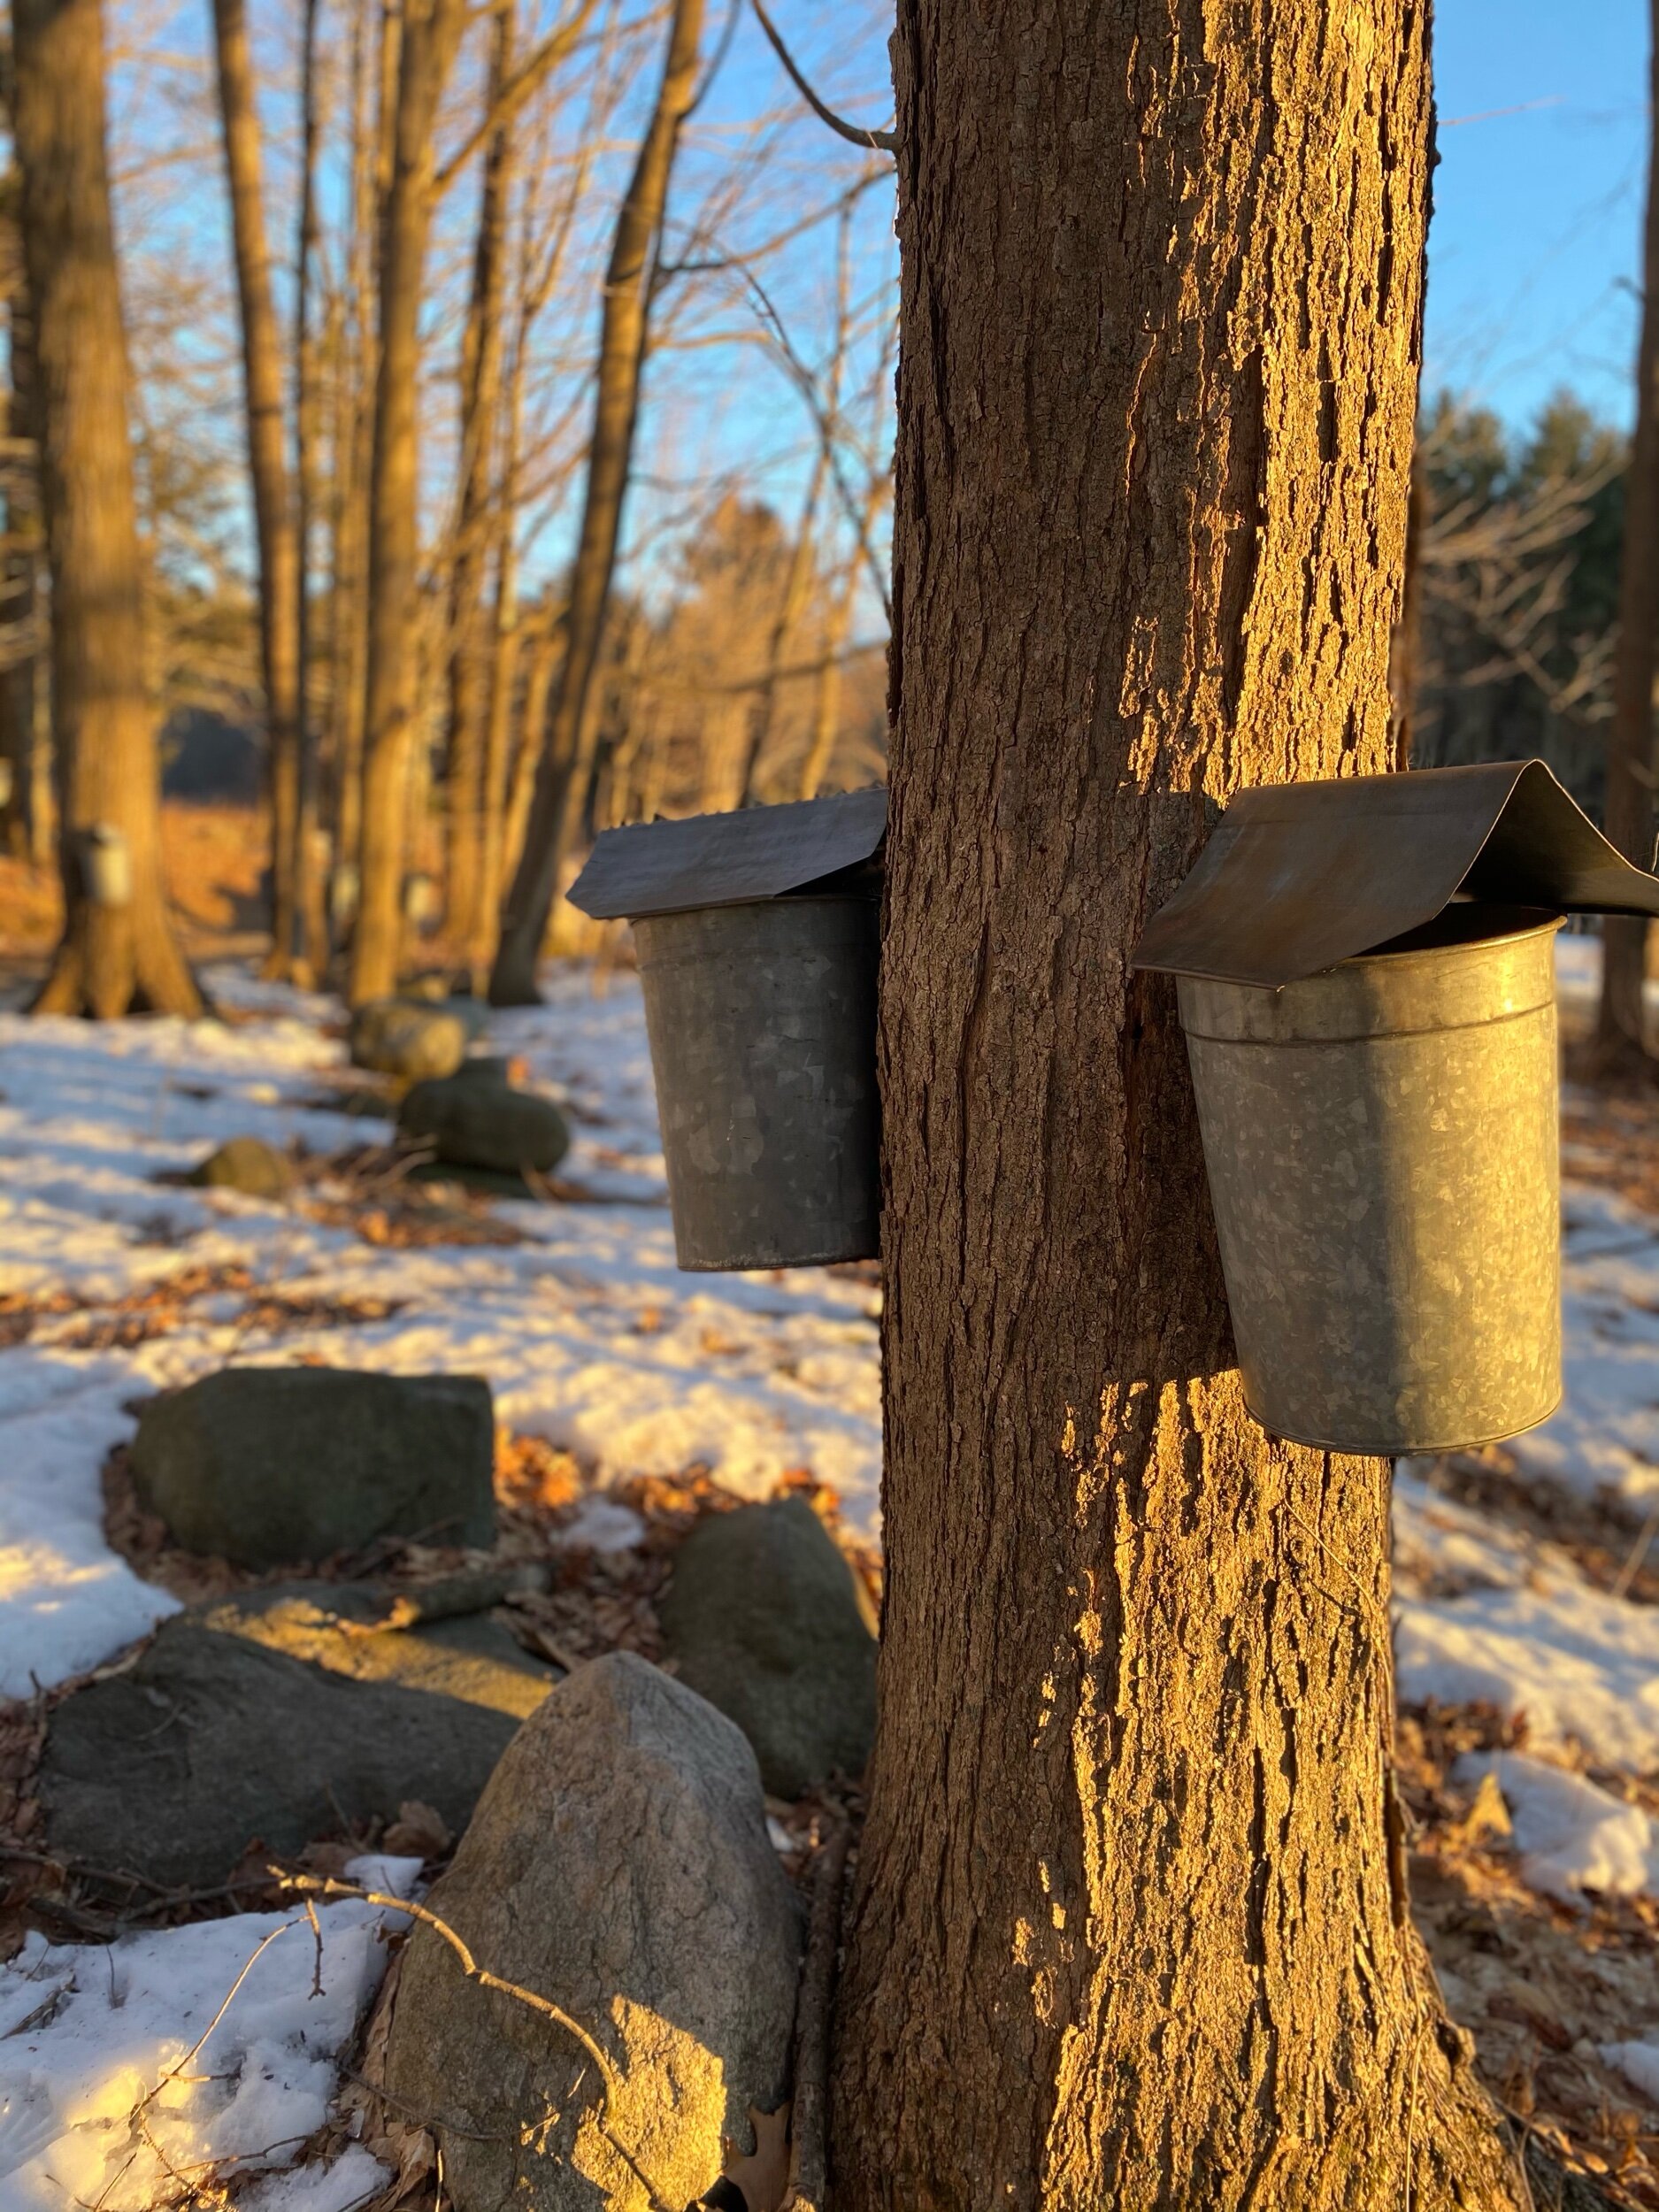
One sure sign that spring is near is the sight of sap buckets (or plastic tubes, as is now common) hanging from maple trees across New England. When temps get warm during the day but stay below freezing at night, it’s the ideal time to tap trees and collect their sweet sap. But for sap to get from a tree to the delicious syrup on our pancakes is not a simple task…

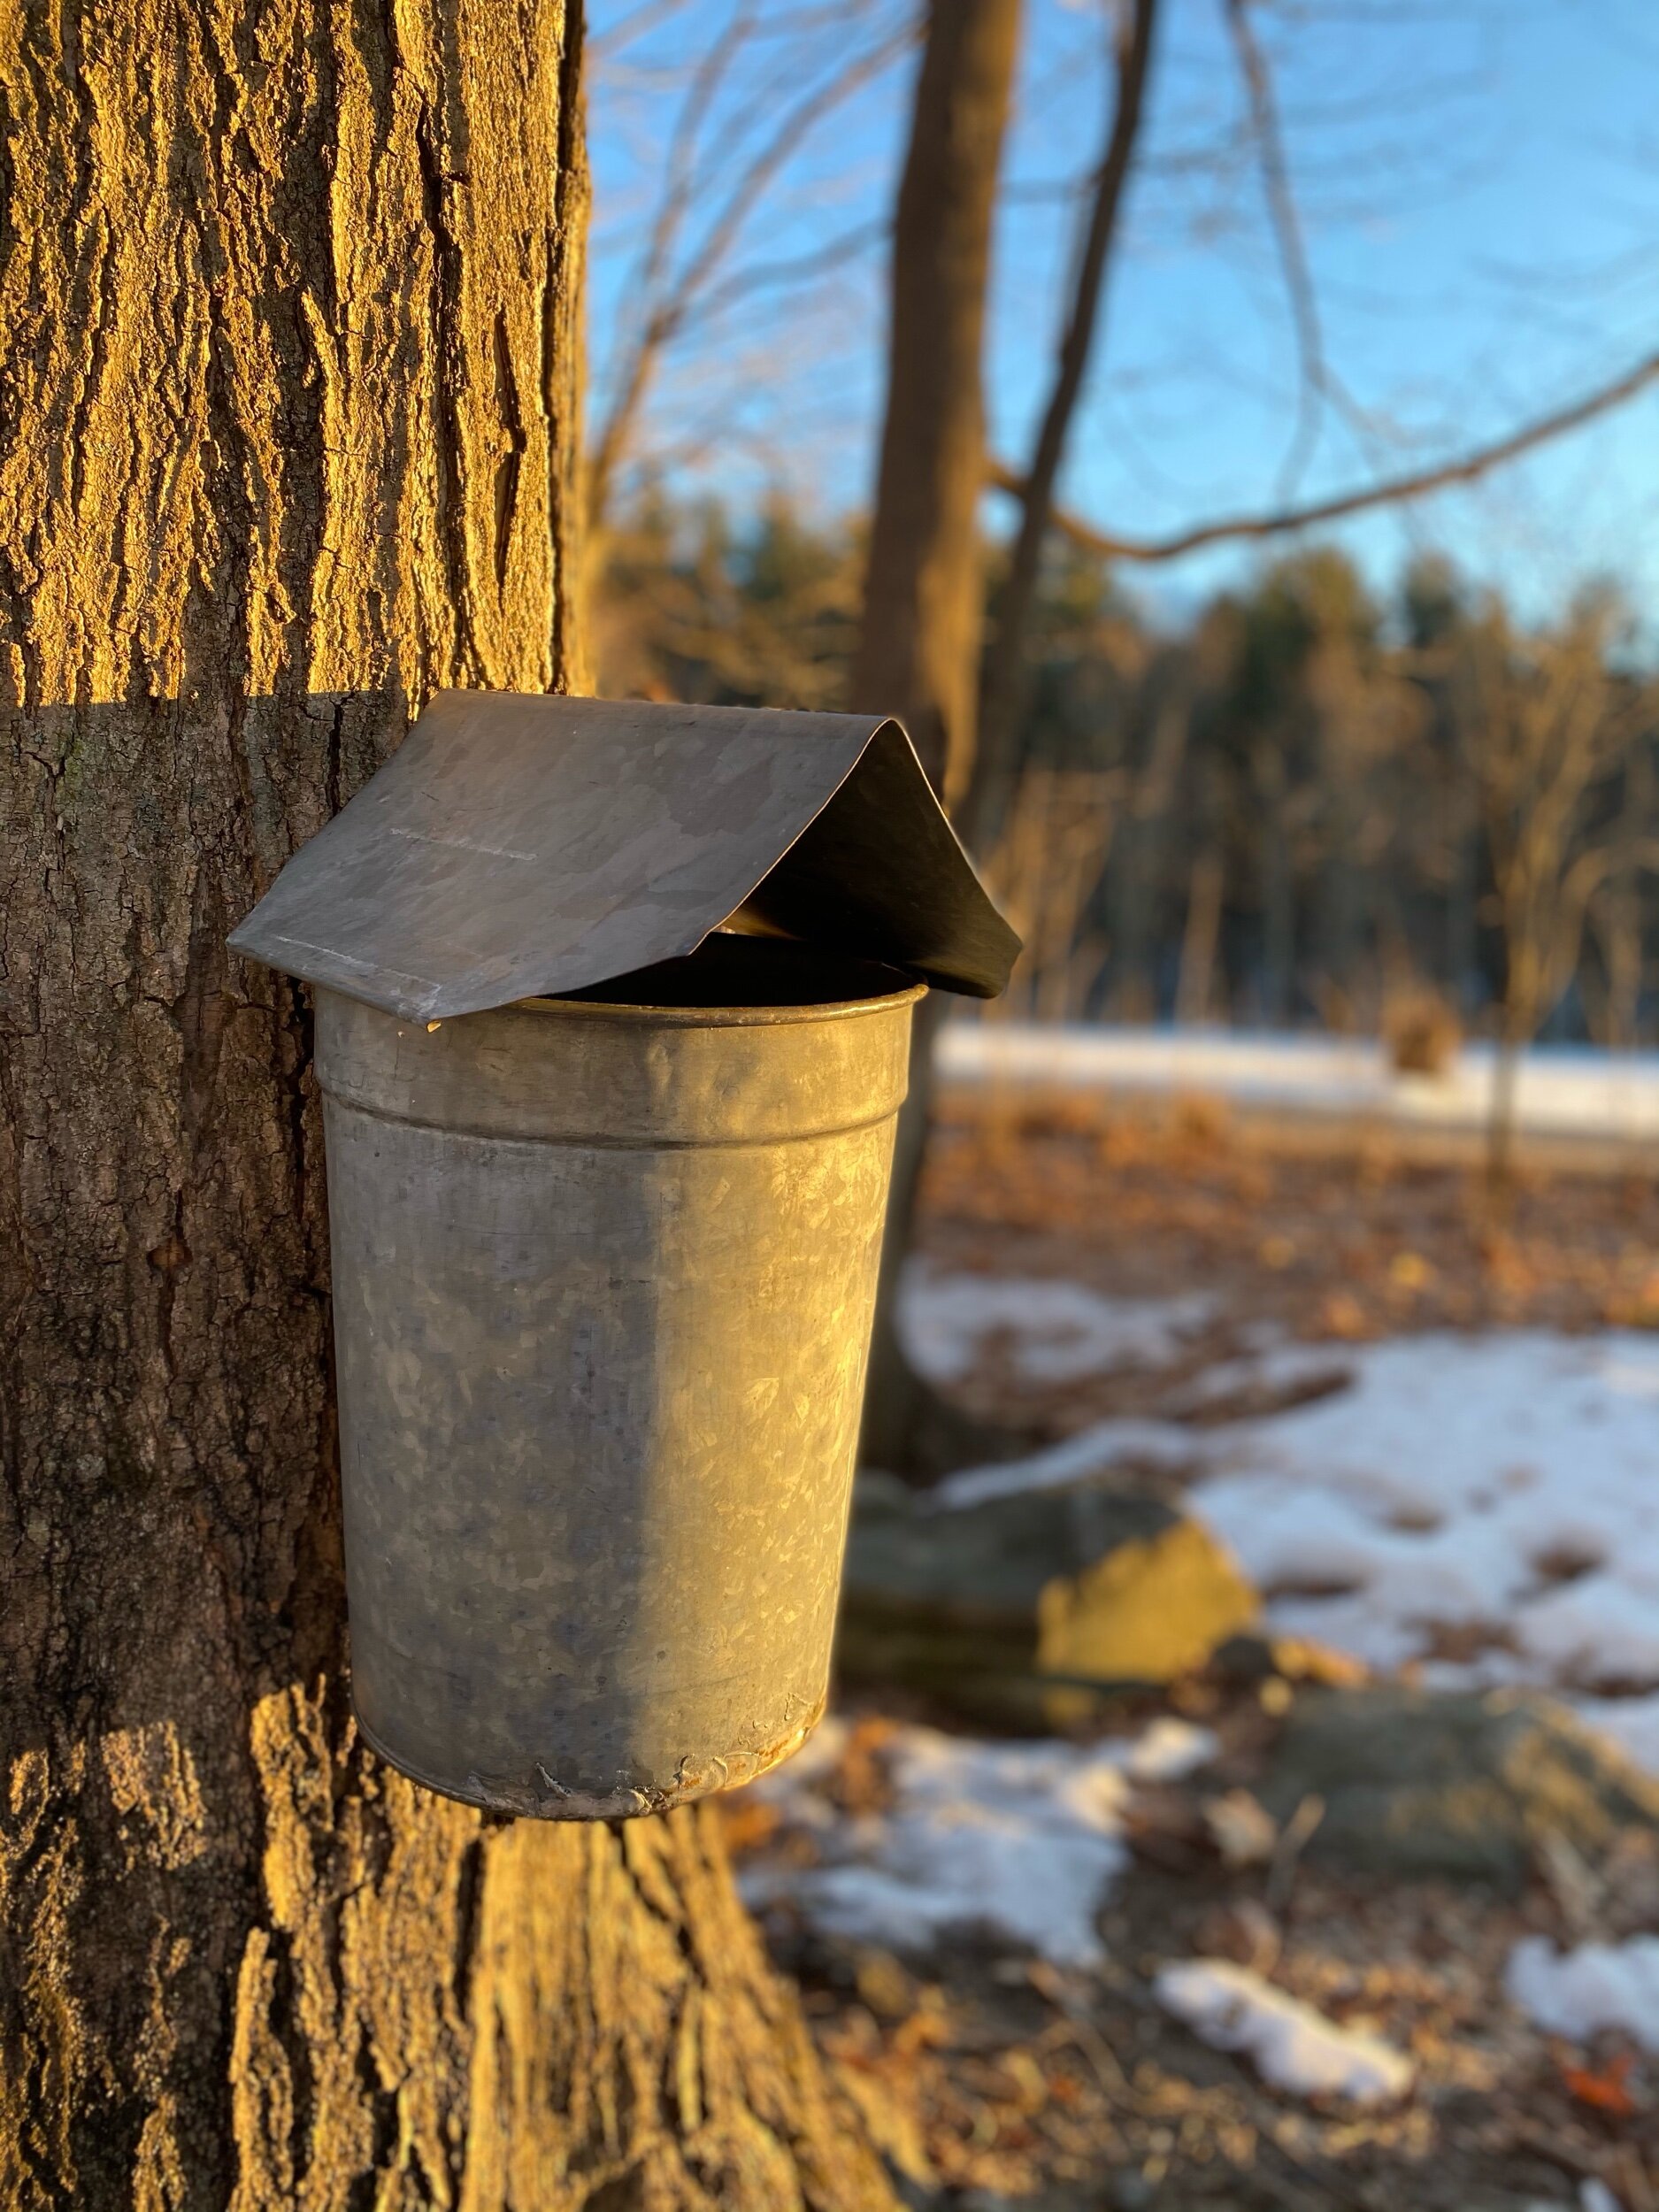
Sap buckets, February 2021.

Sap buckets, February 2021.

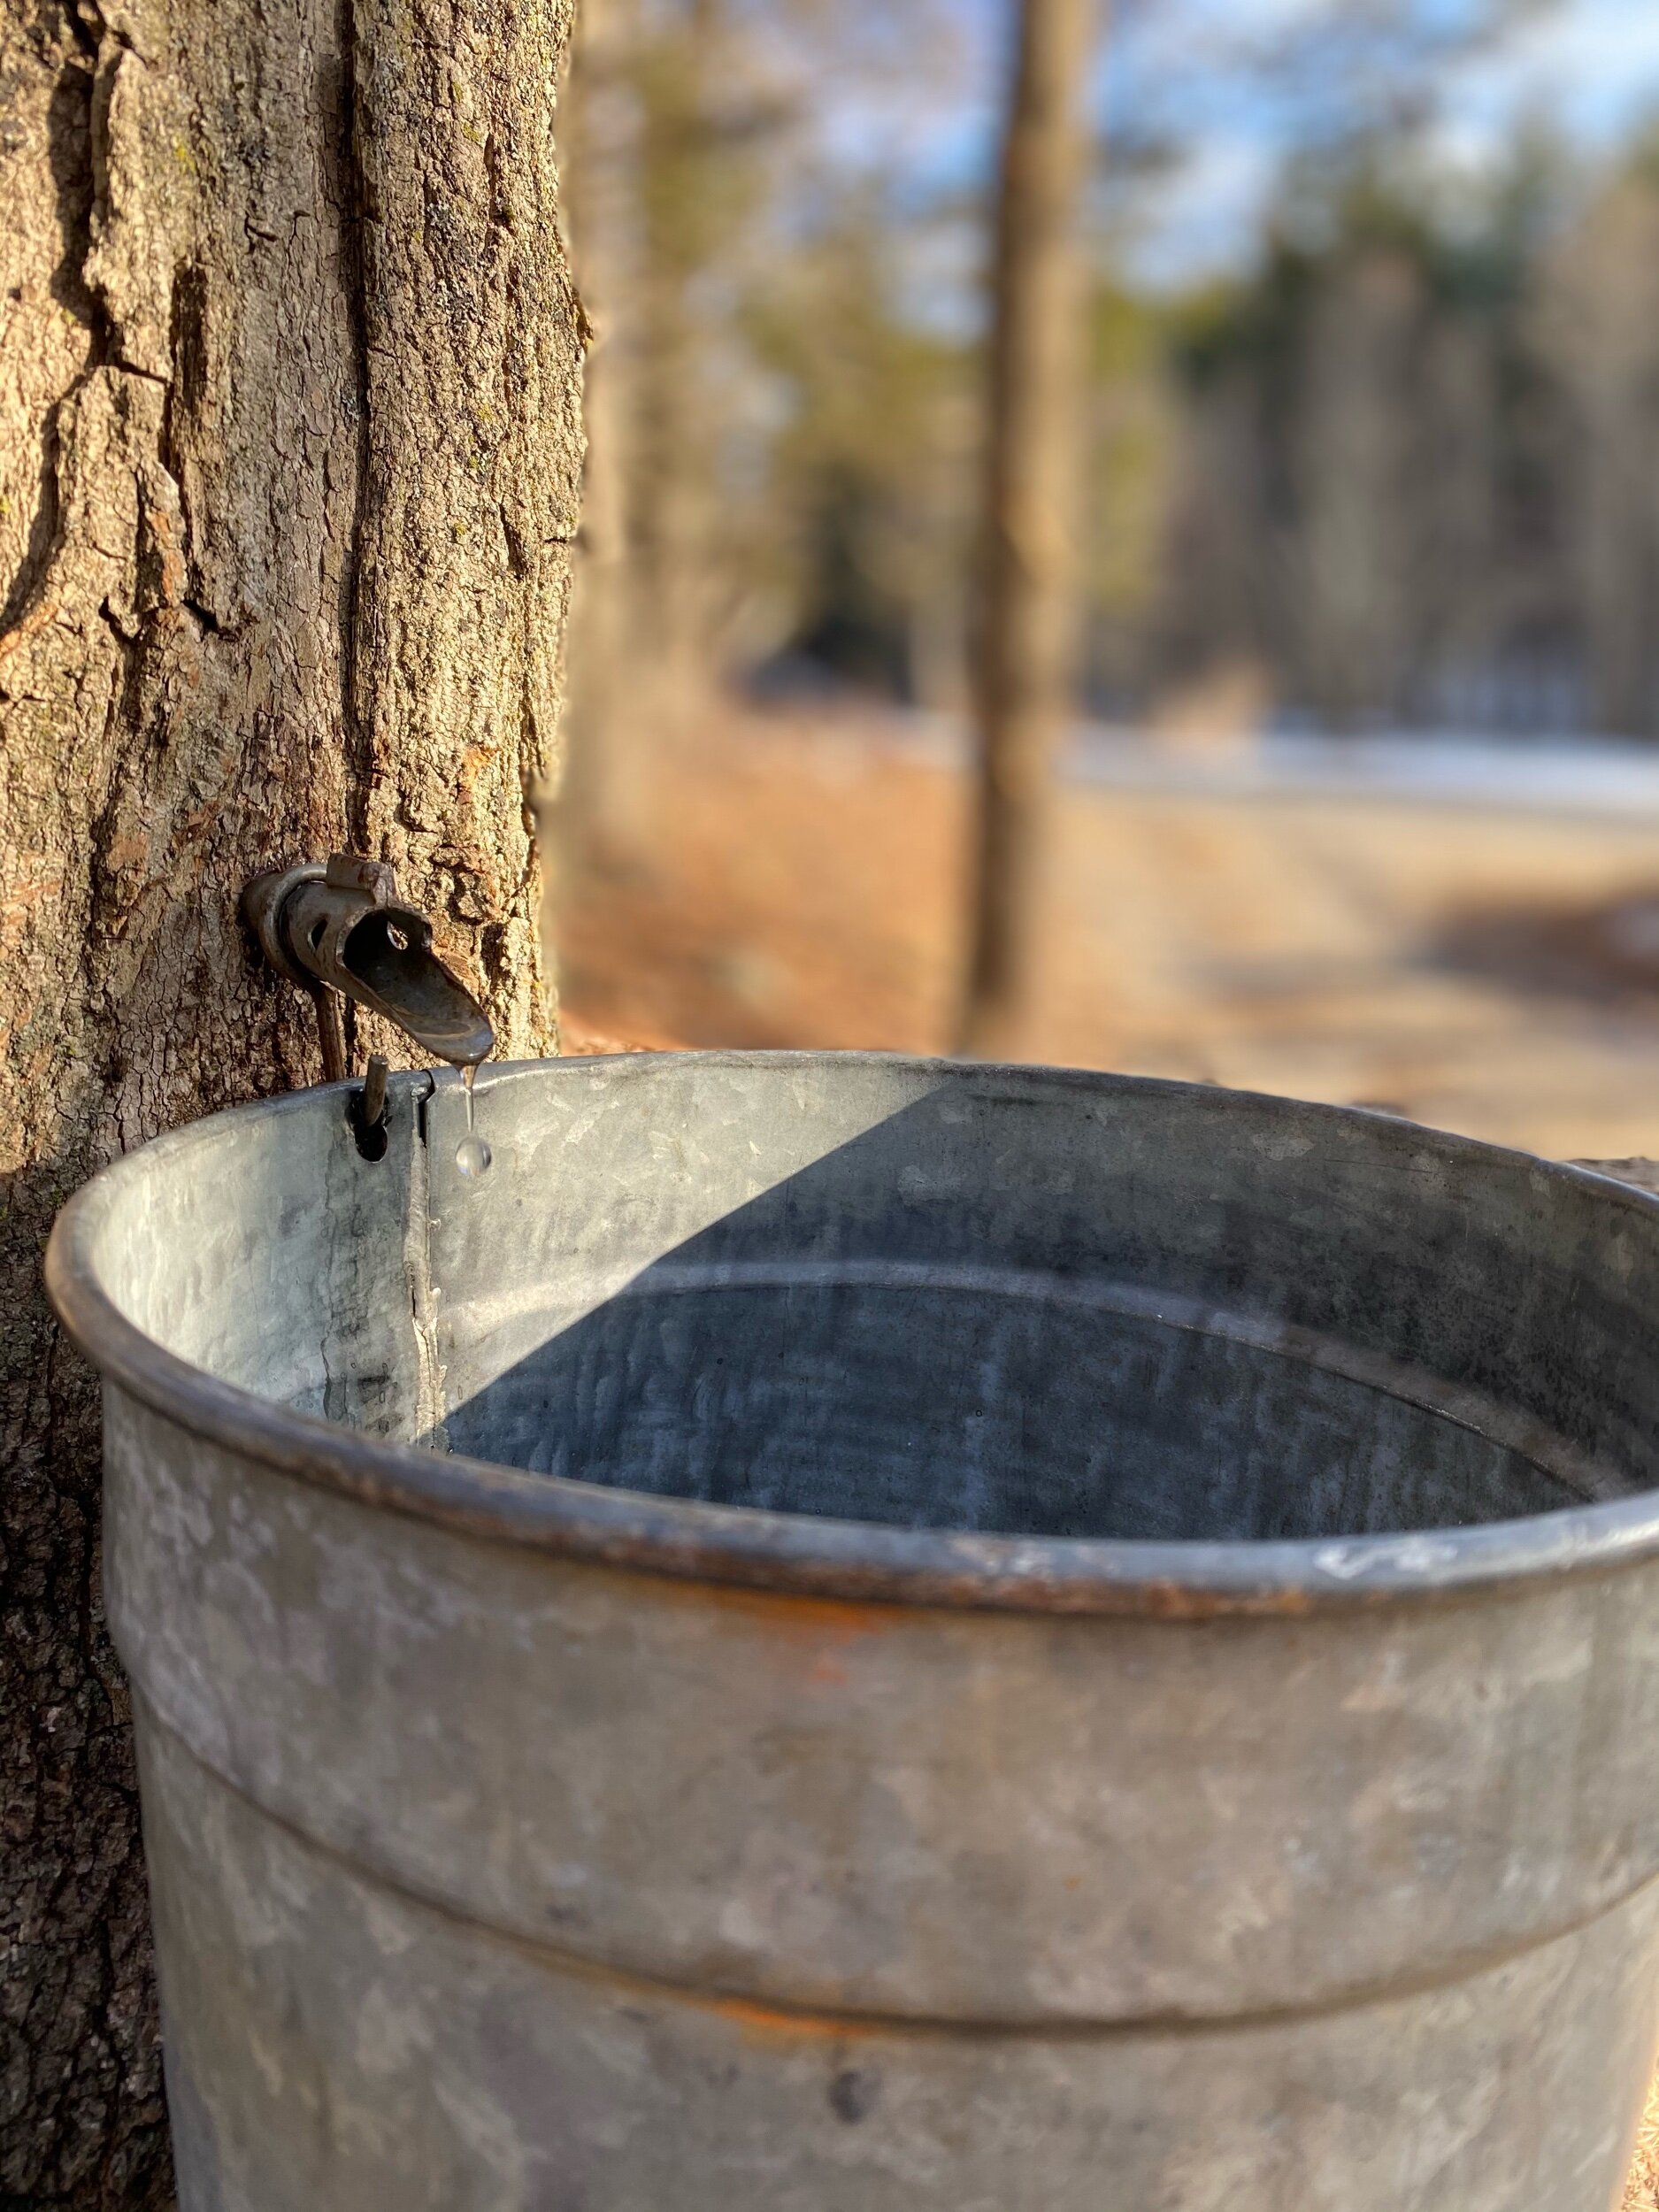
Sap dripping from the spile into a bucket.

Sap dripping from the spile into a bucket.

History

Maple sap was collected by Native Americans as early as 1609. When spring was near, tribes would move to an area of forest that was abundant in sugar maples, establishing “sugar camps” for the few weeks that sap flowed. They would slash “V”s into tree trunks and collect the sap in vessels made of hollowed out logs or clay. Before the time of metal pots, Native Americans would then boil away the sap by dropping hot rocks into the vessels. Back then, there wasn’t an efficient way to store syrup, so they boiled the sap all the way down to dry maple sugar that could easily be stored and saved for use throughout the year.

Production evolved much over the continuing centuries, and eventually “spiles” were used instead of making slashes on the trees. Metal tanks became available for storage, and sap was heated over fires or stoves to evaporate more quickly. Buildings were erected to boil down sap undercover, giving way to the quintessential “sugarhouses” that are still a mainstay in the yearly tradition of maple sugaring.

Sugar Maple Trees

Temperature is the key component for active sap flow. A rise in temperature of the sapwood to above freezing causes a positive pressure within the wood, inducing sap flow. On warm late-winter days which follow cold nights, sap can flow down from the branches and then out a spout drilled into the tree. The sap can also flows back and forth laterally within the tree. It will flow out a “tap” or through a broken or cut branch. The internal pressure of the tree, when it is greater than the atmospheric pressure, causes the sap to flow out, just like how blood flows out of a wound.

The period of sap flow can vary from just a few hours to a few days on end. Many environmental factors and tree metabolic factors affect the length of sap flow period and the amount of sap produced. For strong sap flows to be repeated, a suitable temperature cycle above and below freezing must occur to allow strong positive sap pressure to develop. The sap flow ceases entirely when these temperature cycles cease to exist.

An abundant sap years also depends on the weather conditions of the previous summer to store as much carbohydrates as possible in the form of starch. These stored starch reserves convert to sucrose and are dissolved in the sap as spring approaches. The amount of sugar (sucrose) in the springtime sap depends on many factors including tree genetics, leaf mass, site conditions, amount of sun the previous growing season and overall tree health.

** Fun Fact: While the general rule of thumb is that it takes 40 gallons of sap to make 1 gallon of sugar, the ratio of the trees on our farm (as well as that of the family who taps our trees), is about 36:1. The Roseberry family, who taps our trees, have always believed that that’s due to both farms being long-time dairies with plenty of cow manure to provide nutrients to the maple trees. :-) **

 
Maple trees in autumn at Maplebrook Farm

Maple trees in autumn at Maplebrook Farm


Maple Syrup Production

When “sap season” has arrived, one must tap the trees. This involves drilling holes about two inches deep into the sapwood of a tree, and tapping a “spile” into the hole that will funnel the sap outward. In the “old-fashioned” bucket method, a metal bucket with lid is hung from a hook on the spile to collect the sap. Nowadays, many people use plastic tubing to collect sap, which is more time and labor efficient. In this method, a plastic spout that is connected to a pipeline system is tapped into the tree and allows the sap from multiple taps and trees to all flow into one central vessel.

A maple tree must be a least 10 inches in diameter and in good health before it can be tapped. It usually takes about forty years before a tree will reach tappable size. The hole is usually placed about waist high on the tree, not below any dead limbs, and not near previous tapholes. Larger trees may take as many as three or four taps, but only if they are healthy. If proper tapping procedures are followed, tapping will not endanger the health and vitality of the tree. A healthy sugar maple can provide sap every year for a hundred years or more.

Throughout the 4–6 week sugar season, each tap hole will yield approximately ten gallons of sap. This is only a small portion of the tree’s total sap production and will not hurt the tree. This amount vary greatly from year to year, and depend upon the length of the season, the sweetness of the sap, and many complex conditions of nature, such as weather conditions, soil, tree genetics, and tree health.

Maple sap, as it comes from the tree is a clear, slightly sweet liquid (similar to maple water, which has become a popular item on the market today).

  • The sugar content ranges from one to four percent.

  • A device called a “hydrometer” can be floated in the sap to determine the exact sugar content.

  • Sweeter sap is favored because less water will have to be evaporated to make maple syrup.

  • The sap must be evaporated as soon as possible because the freshest sap makes the best quality syrup

 
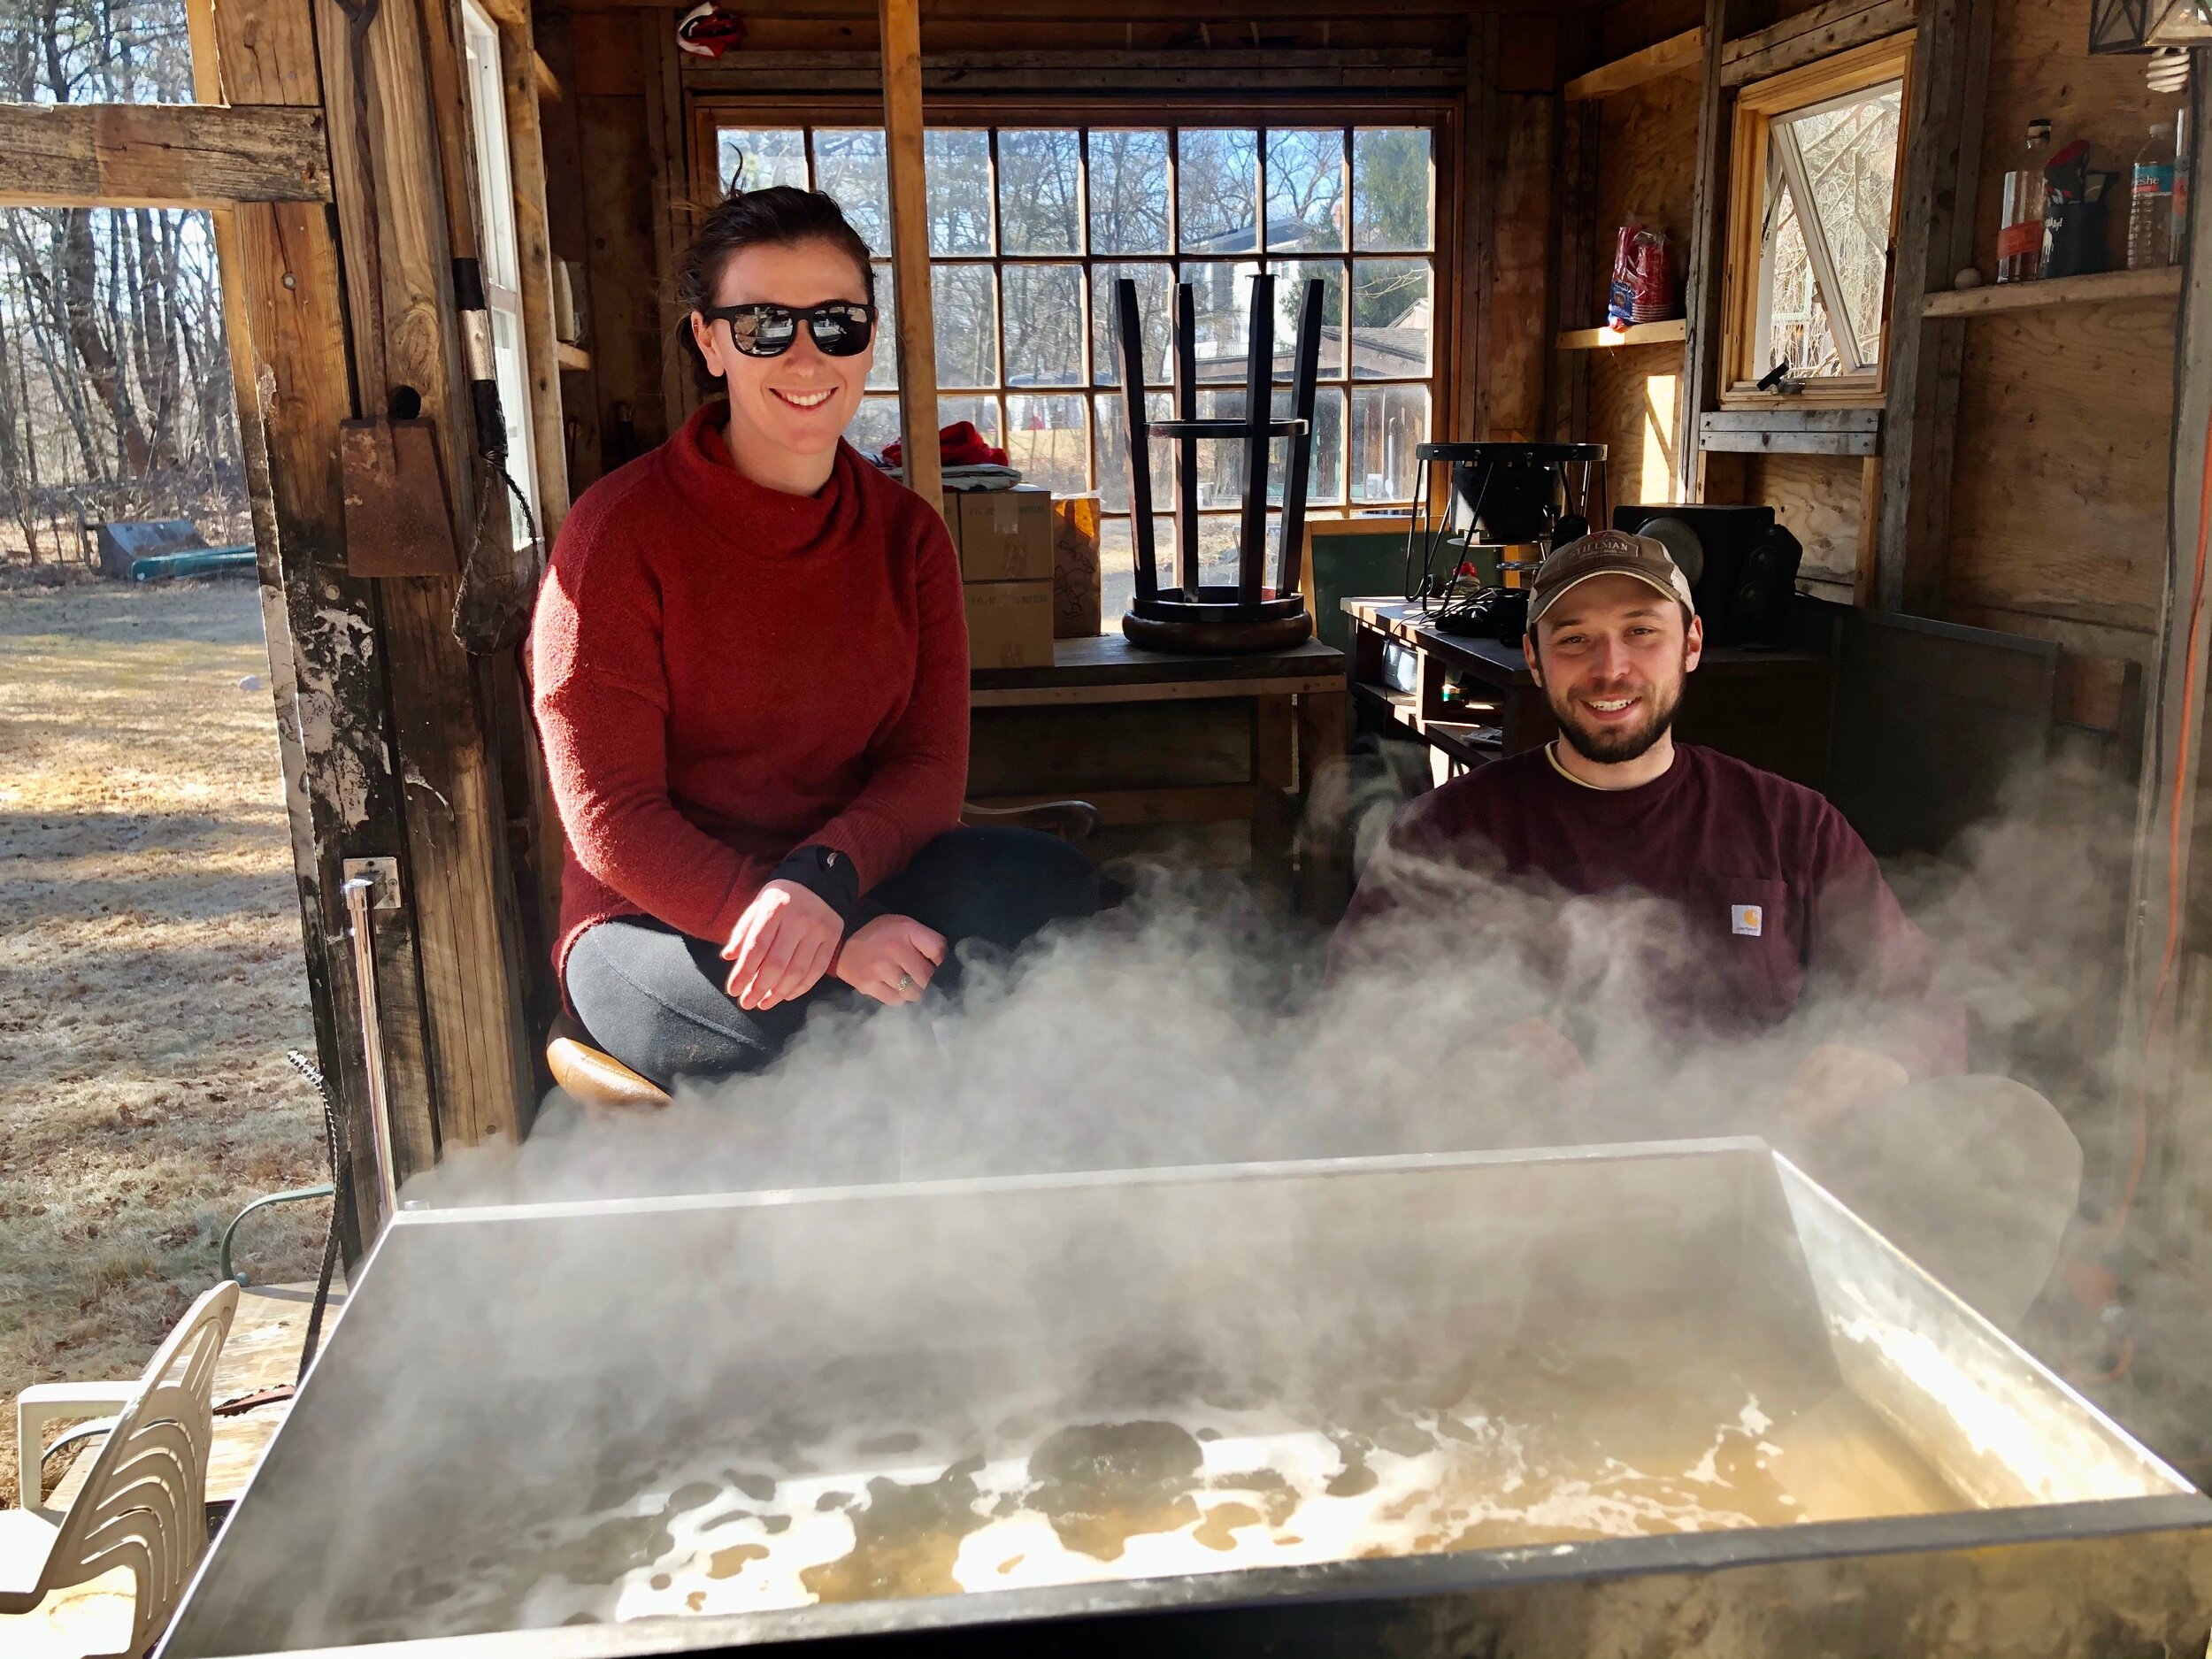
Boiling sap is often a family or community event.

Boiling sap is often a family or community event.


Once collected, sap is boiled down in a “sugarhouse” which can be as rustic or elaborate as once chooses. Every sugar house has an evaporator that is used to boil the sap down into syrup. A hooby sugarmaker can use a much smaller setup, and boiling down syrup on a kitchen stove is possible as well.

  • Evaporators are made up of one or more flat pans which sit on an “arch,” a type of firebox.

  • Wood, oil, gas, wood chips or wood pellets are burned at the front end, and the flames are drawn along the underside of the pan, heating and boiling the sap as they travel towards the rear.

  • It commonly takes about one cord of wood or sixty gallons of oil to boil down 800 gallons of sap into maple syrup.

  • Depending on the size of the evaporator and the number of trees tapped, this may represent anywhere from two hours to two whole days of boiling.

When the temperature of boiling sap reaches seven and a half degrees above the boiling point of water, it is at the proper density and has become maple syrup. Another way of checking for the proper density or sugar content is to place a scoop into the boiling syrup. Coming from the tree, maple sap is approximately 98% water and 2% sugar. When the syrup is finished, it is only 33% water and 67% sugar. It takes approximately 40 gallons of sap to make 1 gallon of sugar.

 
maple syrup facts.jpg

Now is the time to visit a local sugar shack and witness for yourself the process of boiling down sap to syrup. If nothing else, at least pick up a container of REAL maple syrup and discover the pure deliciousness of one of Nature’s best sweets.

CLICK HERE for recipes that utilize maple syrup

 
Photo Credit: Peter Heins, Sunny Knoll Farm

Photo Credit: Peter Heins, Sunny Knoll Farm


All information gathered for this article was sourced from the Massachusetts Maple Producers Association and can be found at massmaple.org.
RECIPE: Vegetable Stock

Between March and May is the hardest time of the year in New England to source locally grown produce. Really the only foods to choose from are overwintered root vegetables, like carrots, rutabaga, and turnips, (which are delicious, but how many rutabagas can you eat in a week?!), as well greens like spinach and lettuce.

To make use of fresh produce available, as well as to best utilize your time and energy while still in winter hibernation, try your hand at making homemade vegetable stock. It is easy to do, and much faster than simmering bones for meat broths.

Directions:

Use whatever veggies you want/have on hand. It can be anything from onions, turnips, and carrots, to celery, cabbage, and mushrooms. Those wilting veggies you’ve had in the crisper drawer for far too long are the perfect ingredients.

Begin by chopping all of the veggies into fine cubes or slices. A food processor can save you a lot of time on that task. Next, fill a saucepan with twice as much water as you have vegetables. Bring to a boil and stir in the produce. Turn off the heat, cover, and let steep for about 5 minutes. Strain out the solids and, once cooled, store in an airtight container in the fridge for up to a week, or the freezer for up to 6 months.

Use this as a base for hearty soups, risottos, or to braise greens and cook grains.

Snapshots & Stories from a Week on the Farm. Early March 2021

Mother Nature has started to tease us with longer daylight, extra warmth, and signs of rebirth. Birds are chirping, daffodils are peeping out of the ground, and a trip outdoors doesn’t require 6 layers of clothing. Spring is near and life is good.
This week, like all others, brought no shortage of good and bad. I take both in stride, learning from the bad and cherishing the good. Here’s a glimpse into this week’s highlight reel….


Mail from Friends

 
IMG_0164.jpeg

A portrait of Eleanor! This was by far the highlight of my week. There is nothing better than getting a hand-drawn card in the mail from one of my very favorite farm friends. The little boy who drew this came on a goat hike a month ago and had an instant connection with Moe the minute she walked out of the barn. The two were inseparable the entire walk, and tears welled in his eyes when it was time to leave. Since then, Moe and I have corresponded with him and his family via snail mail, and they even joined us on a goat photo shoot (goatoshoot) last week. I feel so grateful to know such kind and caring people (young and old) who love our goats just as much as I do.

Here he is pictured below, one hand always on Moe’s back.

 
IMG_7243.jpeg


Chicken Coops Under Siege

 
IMG_0156.jpeg
IMG_0154.jpeg
 

Monday morning I opened the chicken coop to find carnage. A predator (presumably a raccoon) had come for a late night snack and killed two chickens. To spare much of the gory details, I’ll summarize by saying that the chicken coops have slats in the floor, so raccoons will reach up through the slats and try to pull chickens through by their legs. Unfortunately their bodies do not fit through the slats, so the results are miserable. Raccoons have good memories, and will become repeat offenders. I see this happen a lot in the summer time, and the only way to stop it is to fix the problem.

So Monday night I tried to move as many chickens who were roosting on the floor of the coops to higher ground, but didn’t get them all. Tuesday morning, same situation. This time there was also one survivor, pictured above. Betsy, as I now call her (because every needy chicken needs a name, of course), has a chunk of her breast gnawed out, as well as a limp leg. I sprayed liquid band-aid on her wound and moved her into the chicken infirmary so that she won’t get harassed by the other ladies (did you know that chickens are total savages and won’t bat an eye at pecking the wounded to death?). Despite her physical limitations, she is in good spirits, has a steady appetite, and shows a will to live, so I’ll keep rehabbing her until she can move back in with the flock.

To prevent further night-time attacks, I’ve taken to moving every. single. chicken. to high roosts in the coops so that they can’t be reached through the floor slats. Chickens remain stationary in darkness, so once they’re moved to a new roost, they’ll stay there the rest of the night. There’s roughly 70 (out of 367) that get moved every night, which is quite the chore at the moment, but worth every bit of effort if it can prevent mangled chickens.


Orion’s Jaunt

 
IMG_0146.jpeg
 

During the winter the goats live in a mobile house across the street from my house, which makes for easy access for feeding and watering during potential winter-y conditions. But on the weekends they move down to our main barn where they wait to go on goat walks. On Sunday afternoon after our last weekend walk, I let the goats out of the barn to walk back up to their goat mobile. Goats are herd animals, and don’t like being separated from each other, so I don’t usually have to worry about any single one of them wandering off.

Well. I made it up the hill to the goat mobile and no sooner had I put them in their pen that I got a call from my uncle asking if I was missing a goat. A quick look around and I realized that I was in fact missing a goat. Orion. If you’ve been on a goat walk, you will know Orion to be not the brightest bulb in the bunch. He is a big ol’ softie, but slower than most in mental faculties, and we love him for it.

So sure enough my uncle says that Orion’s trying to follow a family who’s out for an afternoon walk up the hill. So I headed down the hill to grab him while my uncle and the surprised walkers escorted him in the proper direction. The poor boy must have been distracted by something, probably food, when we left the barn for our pilgrimage, that he completely missed the fact that we left.

All is well that ends well, and the family out for an afternoon stroll was delighted to be joined by a goat for part of their walk.


Maple Syrup Season

 
IMG_0018.jpeg
IMG_0122.jpeg
 

One sign of Spring is the installment of the sap buckets on the Maple trees around our farm. Sap season is in full swing, and the weather of the past few weeks has been moderately good for production.

We are often asked if we sell our maple syrup, and here’s the full explanation:

The Roseberry Family of Sterling has been tapping our Maple trees for 40 years. They put in all of the hard work to install buckets, collect sap, and boil it down into syrup, and kindly share some of the final product with us. They don’t produce enough syrup for us to sell from our farm, so as a next-best alternative, we offer maple syrup from our good friends, the Heins family, of Sunny Knoll Farm in Westminster for sale year round in our stand. We hear from our customers all the time that it is some of the best maple syrup they’ve ever tasted, and we’re proud to support another hard working farm family by offering their best product at our stand.

A full blog post on the art and science of maple syrup production is coming soon…


Eleanor Update

 
IMG_0004.jpeg
 

So many of you have fallen in love with Eleanor and inquired about her often. We’re really feeling the love, and pass it all on directly to this sweet little goat. I am happy (and slightly ashamed) to share that Eleanor is thriving, and becoming quite the spoiled goat of the household. She sleeps on my bed at night, and I have completely house-trained her, which I didn’t know was even possible with goats. I think she’s just extra-smart…
You’ll also be happy to hear that she has acclimated very well with the rest of the herd, and they are much more respectful of her now than when she first arrived. It is so cute to watch her interact with the other goats, especially Orion (mentioned above) who is extra-gentle when playing silly goat antics with her.


RECIPE: Simple Sloppy Joes

Perfect for a quick week-night meal, that’s guaranteed to please the whole family.

Ingredients:

  • 2 pounds ground beef

  • 1 small onion, chopped

  • 1 1/4 cups water

  • 2 beef bouillon cubes

  • 1/2 cup ketchup

  • 2 tablespoons spicy brown mustard

  • 3 tablespoons cider vinegar

  • 1 tablespoon Worcestershire sauce

  • 3 tablespoons orange juice

  • 3 tablespoons brown sugar, packed

  • 2 tablespoons paprika

  • 1 teaspoon black pepper

  • 1 tablespoon sweet pickle relish (optional)

Directions:

  1. Brown the ground beef; add chopped onions

  2. Add water and bouillon cubes. Simmer until the cubes are dissolved

  3. Add the remaining ingredients and simmer until the desired consistency is achieved

  4. Serve on hamburger buns

Meet Eleanor the Goat!

Eleanor is a one month old Alpine/Nubian goat that joined our farm on Thursday, February 4th, 2021.

IMG_6924.jpeg

Eleanor was born at The Herb Hill Farm in Pepperell as a triplet. Her mother couldn’t keep up feeding three kids, so she was the primary bottle baby. Over the past week she’s settled right in to her new home at Maplebrook Farm.

IMG_6971.jpeg
IMG_6969.jpeg

For now, Eleanor lives in my house, as she doesn’t have a buddy to keep her company and the older goats are very jealous of her and like to beat up on her.

She gets fed a bottle of goat’s milk (I saved surplus from my own dairy goats last year, which has worked out perfectly) three times per day but has a big appetite for every thing else she can get her mouth on. She is the stereotypical goat that literally eats everything (including my truck registration).

IMG_6921.jpeg

Nobody gets to live for free on the farm, so of course we put Eleanor to work right away, and found that she came with quite the impressive resume.

So far she has overseen the construction of the new farm stand (employee moral is her specialty)…

IMG_6959.jpeg
IMG_6958.jpeg

She does quality control on egg cleaning, and specializes in inspection of cartons and labels…

IMG_7082.jpeg
IMG_7096.jpeg

She jumped right into the goat hike lineup…

IMG_7057.jpeg

And occasionally she can be seen greeting customers at the farm stand.

IMG_7030.jpeg
IMG_7018.jpeg

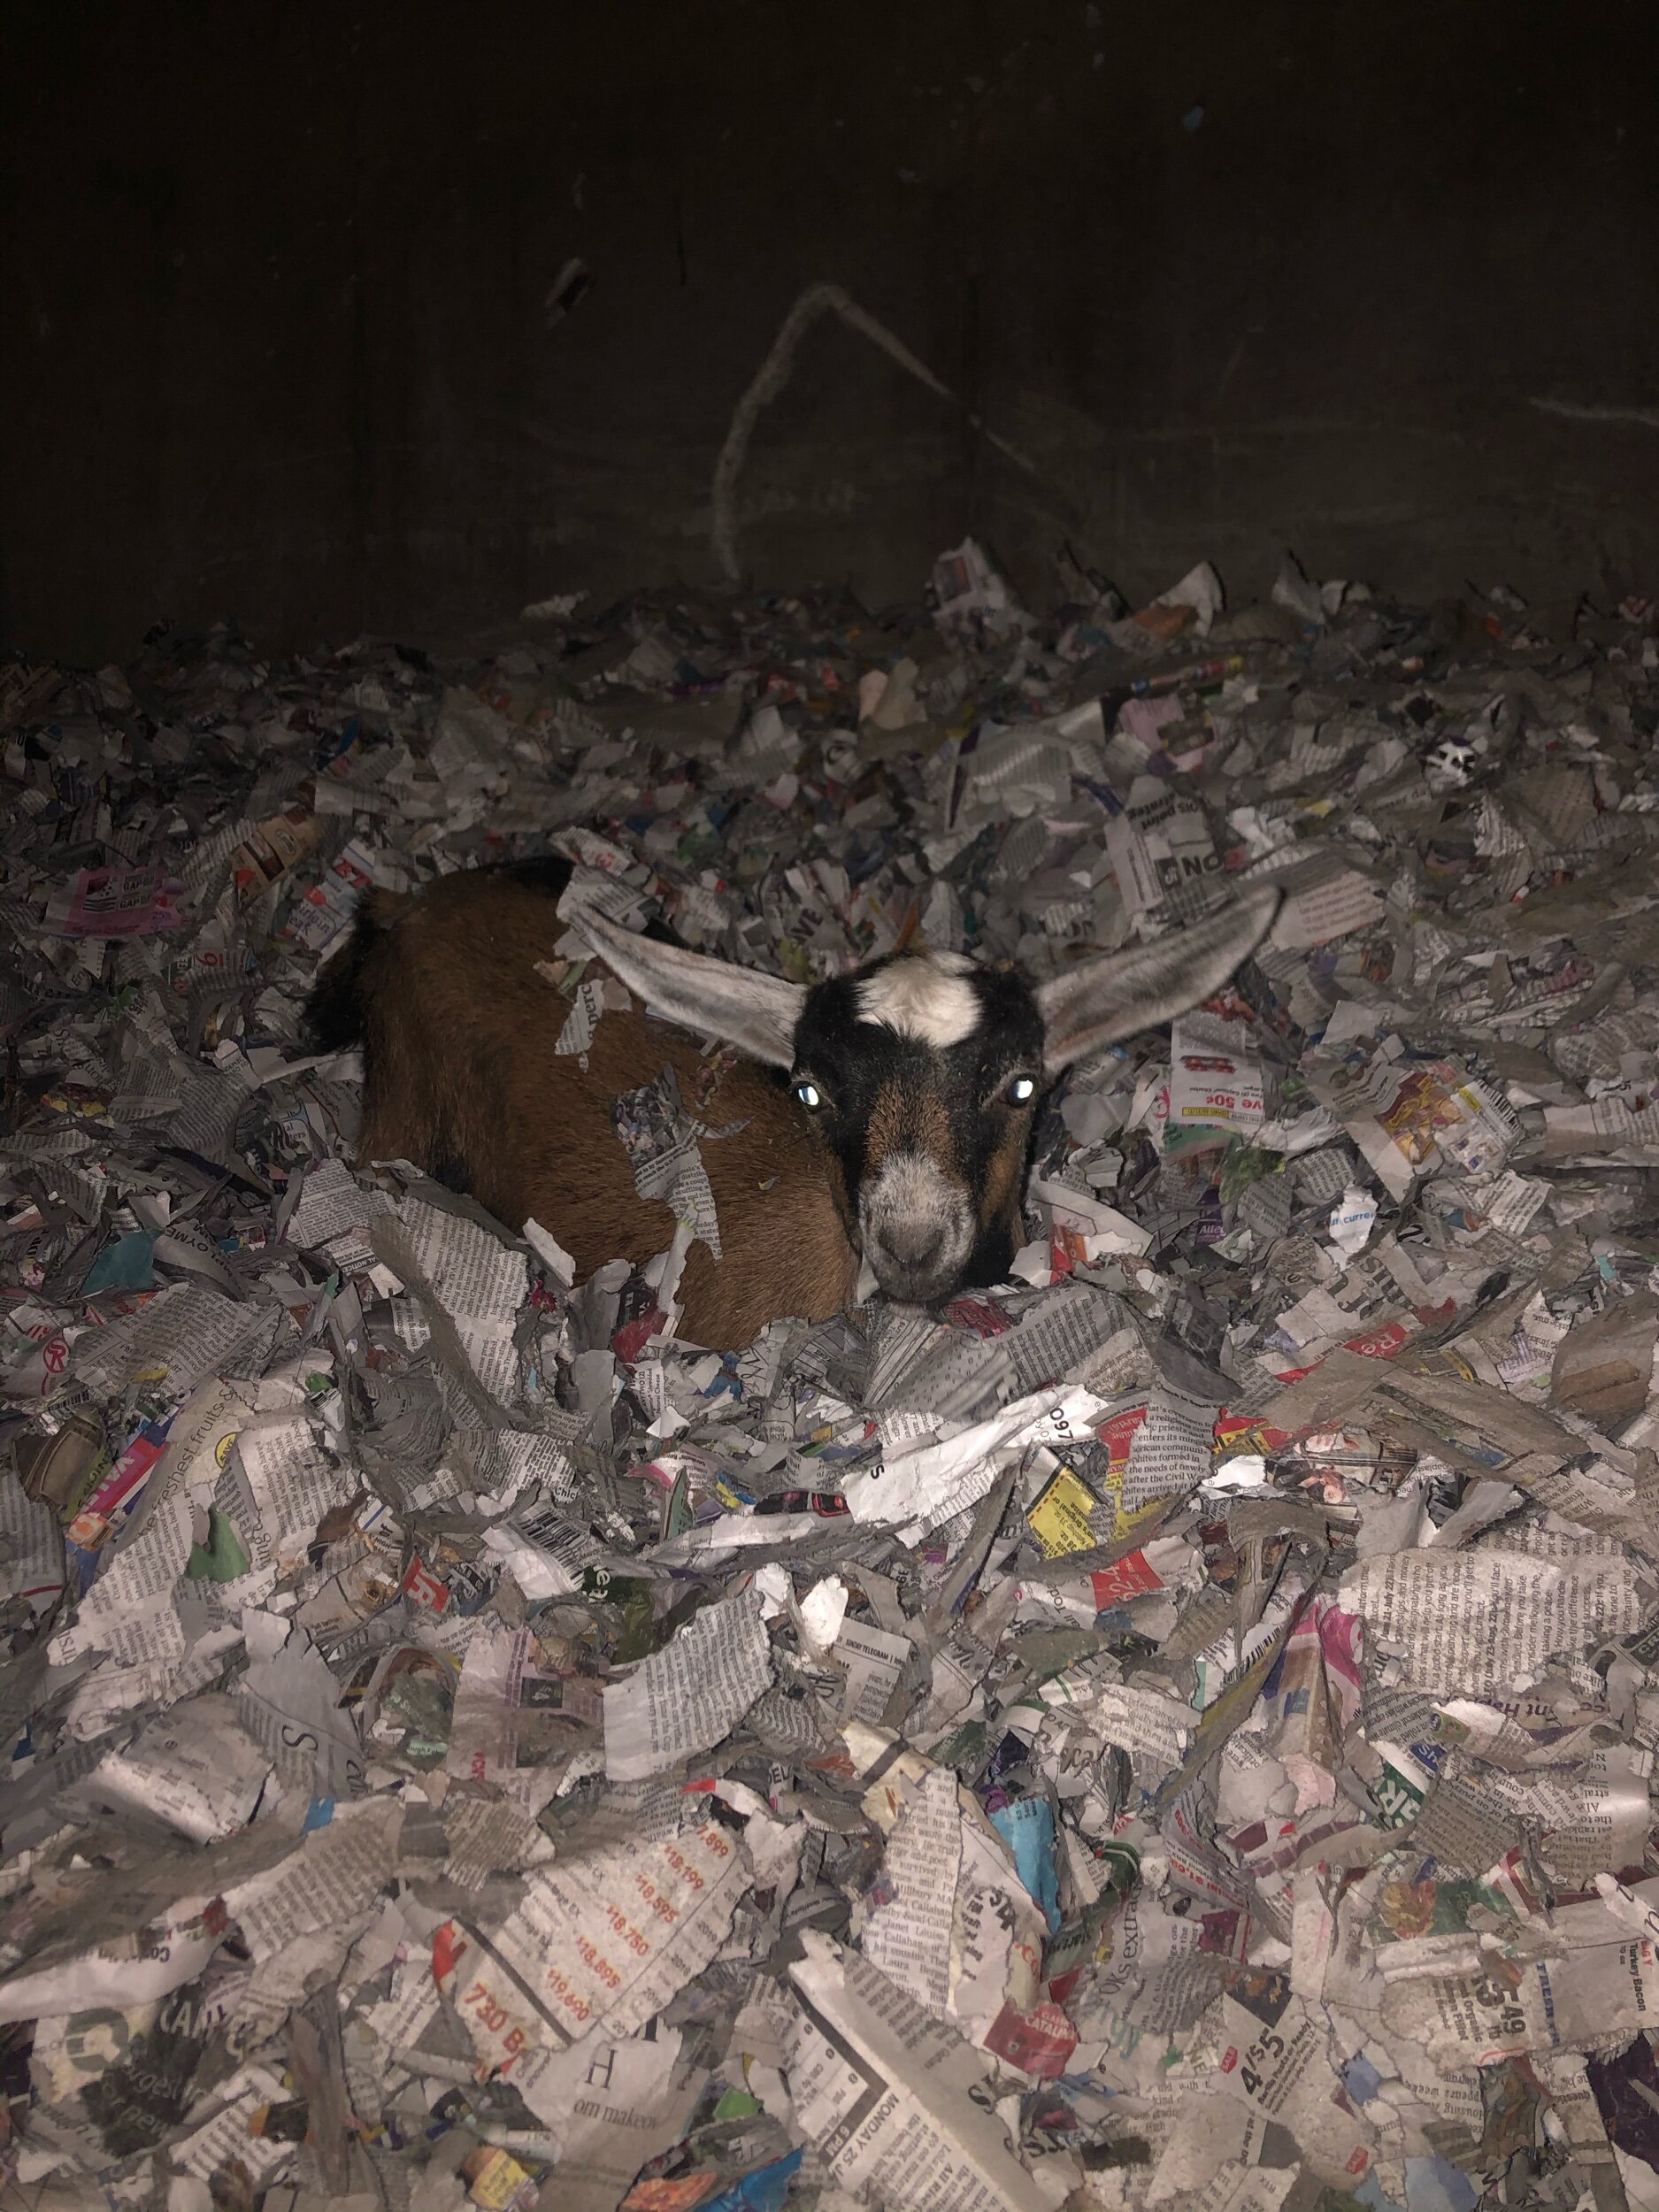
Eleanor doesn’t like being left alone, so for now she goes everywhere I go. She even helps out at Cooper’s Hilltop Farm on the nights that I milk cows (although she prefers playing in/eating the pile of shredded newspaper).

IMG_6936.jpeg

At the end of a long day Eleanor likes to come home and get into all kinds of mischief in the house. Her favorite room is the bathroom, where she just recently discovered the magic of toilet paper.

Eleanor is so sweet, smart, and inquisitive. She is the perfect addition to our farm and I look forward to sharing her with more of you in the months ahead.

IMG_7032.jpeg

2021 Farm Plans

One of my favorite things about living and working on the farm is that the sky is the limit when it comes to making my dreams a reality.

2021 will be a momentous year for making some of my very biggest dreams come true. So here’s the lineup of new things to come for our farm in the year ahead…

New Farm Stand:

First on the to-do list this year is to get a new farm stand built. The current stand has served us well, but our offerings have outgrown it’s size. Additionally, it sits on a trailer, which is preventing us from wiring electricity into it.

The new stand will be twice the size, and more permanent, so we’ll be able to install electricity in it for lighting, refrigerators, and freezers. This will allow us to expand our offerings and bring you more of the foods you’ve been requesting.

The new farm stand will be built in a traditional timber frame style.

The new farm stand will be built in a traditional timber frame style.

On a similar topic: we have a new online store that features everything that’s offered in the farm stand (including these rad new t-shirts featuring Moe). You can place orders online to pick up at a designated time in the farm stand, or have many of our products (besides perishables) shipped to your home.

This time of year we have a very limited variety of farm goods, but as the weather warms up and the season progresses we’ll have much more to offer.

Goat t-shirts

Goat t-shirts

A few more kids:

Goat kids, that is! I did not breed my goats this past year, so we won’t have any births on the farm, but because baby goats are just too cute, a few new kids from another local farm will join us within the next month or two.

After much debate, I’ve decided to continue goat hikes throughout this year. We are completely booked for weekend hikes about two months in advance, so keep that in mind if you want a baby goat fix!

Goat kids born in 2020

Goat kids born in 2020

Chickens:

Layers- We’re adding more laying hens to the flock, which means more eggs! I currently have just under 400 hens, and get 21 dozen egg per day. You’d think that’d be plenty, right?! Truth is, we still can’t supply enough eggs to meet demand. So more chickens will arrive in April (the exact number I cannot reveal yet, as my mother may have a heart attack when she finds out LOL).

Currently you can buy our eggs at our farm stand, as well as at Cooper’s Hilltop Farm in Leicester (my beloved farm-away-from-farm) and Maker to Main in Worcester (an awesome source for all things local).

Broilers- I am taking the year off from raising meat chickens. They have never been my favorite farm animal, and with many new projects on my plate this year, I am trying to avoid spreading myself too thin. We still have chicken in the freezer from last season, so there’s still time to get it if you love pastured chicken or have been wanting to try it.

Photo taken by Brian Doben.

Photo taken by Brian Doben.

Veggies:

You asked, and we’re making it happen! We’ve had so many requests to offer vegetables from our farm. I am a livestock farmer through and through and have always rebelled at the thought of growing vegetables. BUT… one of my best friends from college, Julia, is a vegetable farmer extraordinaire, and she will have a garden on our farm this year to grow and sell veggies at the stand.

Julia, the veggie queen.

Julia, the veggie queen.

Dairy Cows & Raw Milk:

The moment I have been waiting my whole farmer life for. There are still many moving parts and details to work out in this plan, but my goal is to have dairy cows on our farm by this summer! My family owned a herd of Ayrshires for many decades, but sold our cows about 20 years ago. Ever since I decided I wanted to be a farmer, I have dreamed of bringing Ayrshires back to our farm. Ayrshires are a lesser-known breed of cattle that have red and white coloring, and are especially hardy animals- great for New England conditions.

We’ll offer raw milk from our cows directly to customers in our farm stand. Stay tuned for more details as we continue to finalize these plans!

Ayrshire Cow.

Ayrshire Cow.

That’s all the big news for now. We have additional projects planned to improve our infrastructure and land, but nothing too exciting that’s worth mentioning now. Thanks so much to all who follow along with our farm, whether in person or online, and cheer me on as I build the farm of my dreams.

Egg 101!

 
Adjustments.jpeg
 

Eggs are the most sought-after food from local farms. It’s no wonder… have you ever tried farm-fresh eggs? The difference in taste of a fresh egg compared to one that is store bought is hardly even comparable. They have brighter yolks and are richer in color, flavor, and texture. Once you eat farm-fresh eggs, you’ll never want to go back to the lack-luster store-bought ones.


The Incredible, Edible, NUTRITIONAL Egg:

  • Egg yolks are the richest source for two important carotenoids- lutein and zeaxanthin. These fat-soluble antioxidants combat macular degeneration, cataracts, support overall healthy vision, protect the skin against sun damage, and can reduce risk of colon and breast cancer.

  • One large, whole, fresh egg provides all essential protein-building amino acids, and offers 6 to 7 grams of protein. It also contains 5 grams of fat (with about 1.5 grams of it saturated), which is great for the absorption of all of the egg’s fat-soluble vitamins. One egg serves up about 200 milligrams of good cholesterol and contains vitamins A, K, E, D, B-complex and minerals iron, phosphorus, potassium, and calcium.

  • Eggs contain Choline, a fatty substance found in every living cell, and is a major component of brain health. Choline also helps preventing fat and cholesterol from sticking to arteries.

  • Eggs laid by chickens who have a pasture-based, free range lifestyle, contain more omega-3 fatty acids, folic acid, and vitamins E, A and B12 than eggs from chickens conventionally raised solely indoors.

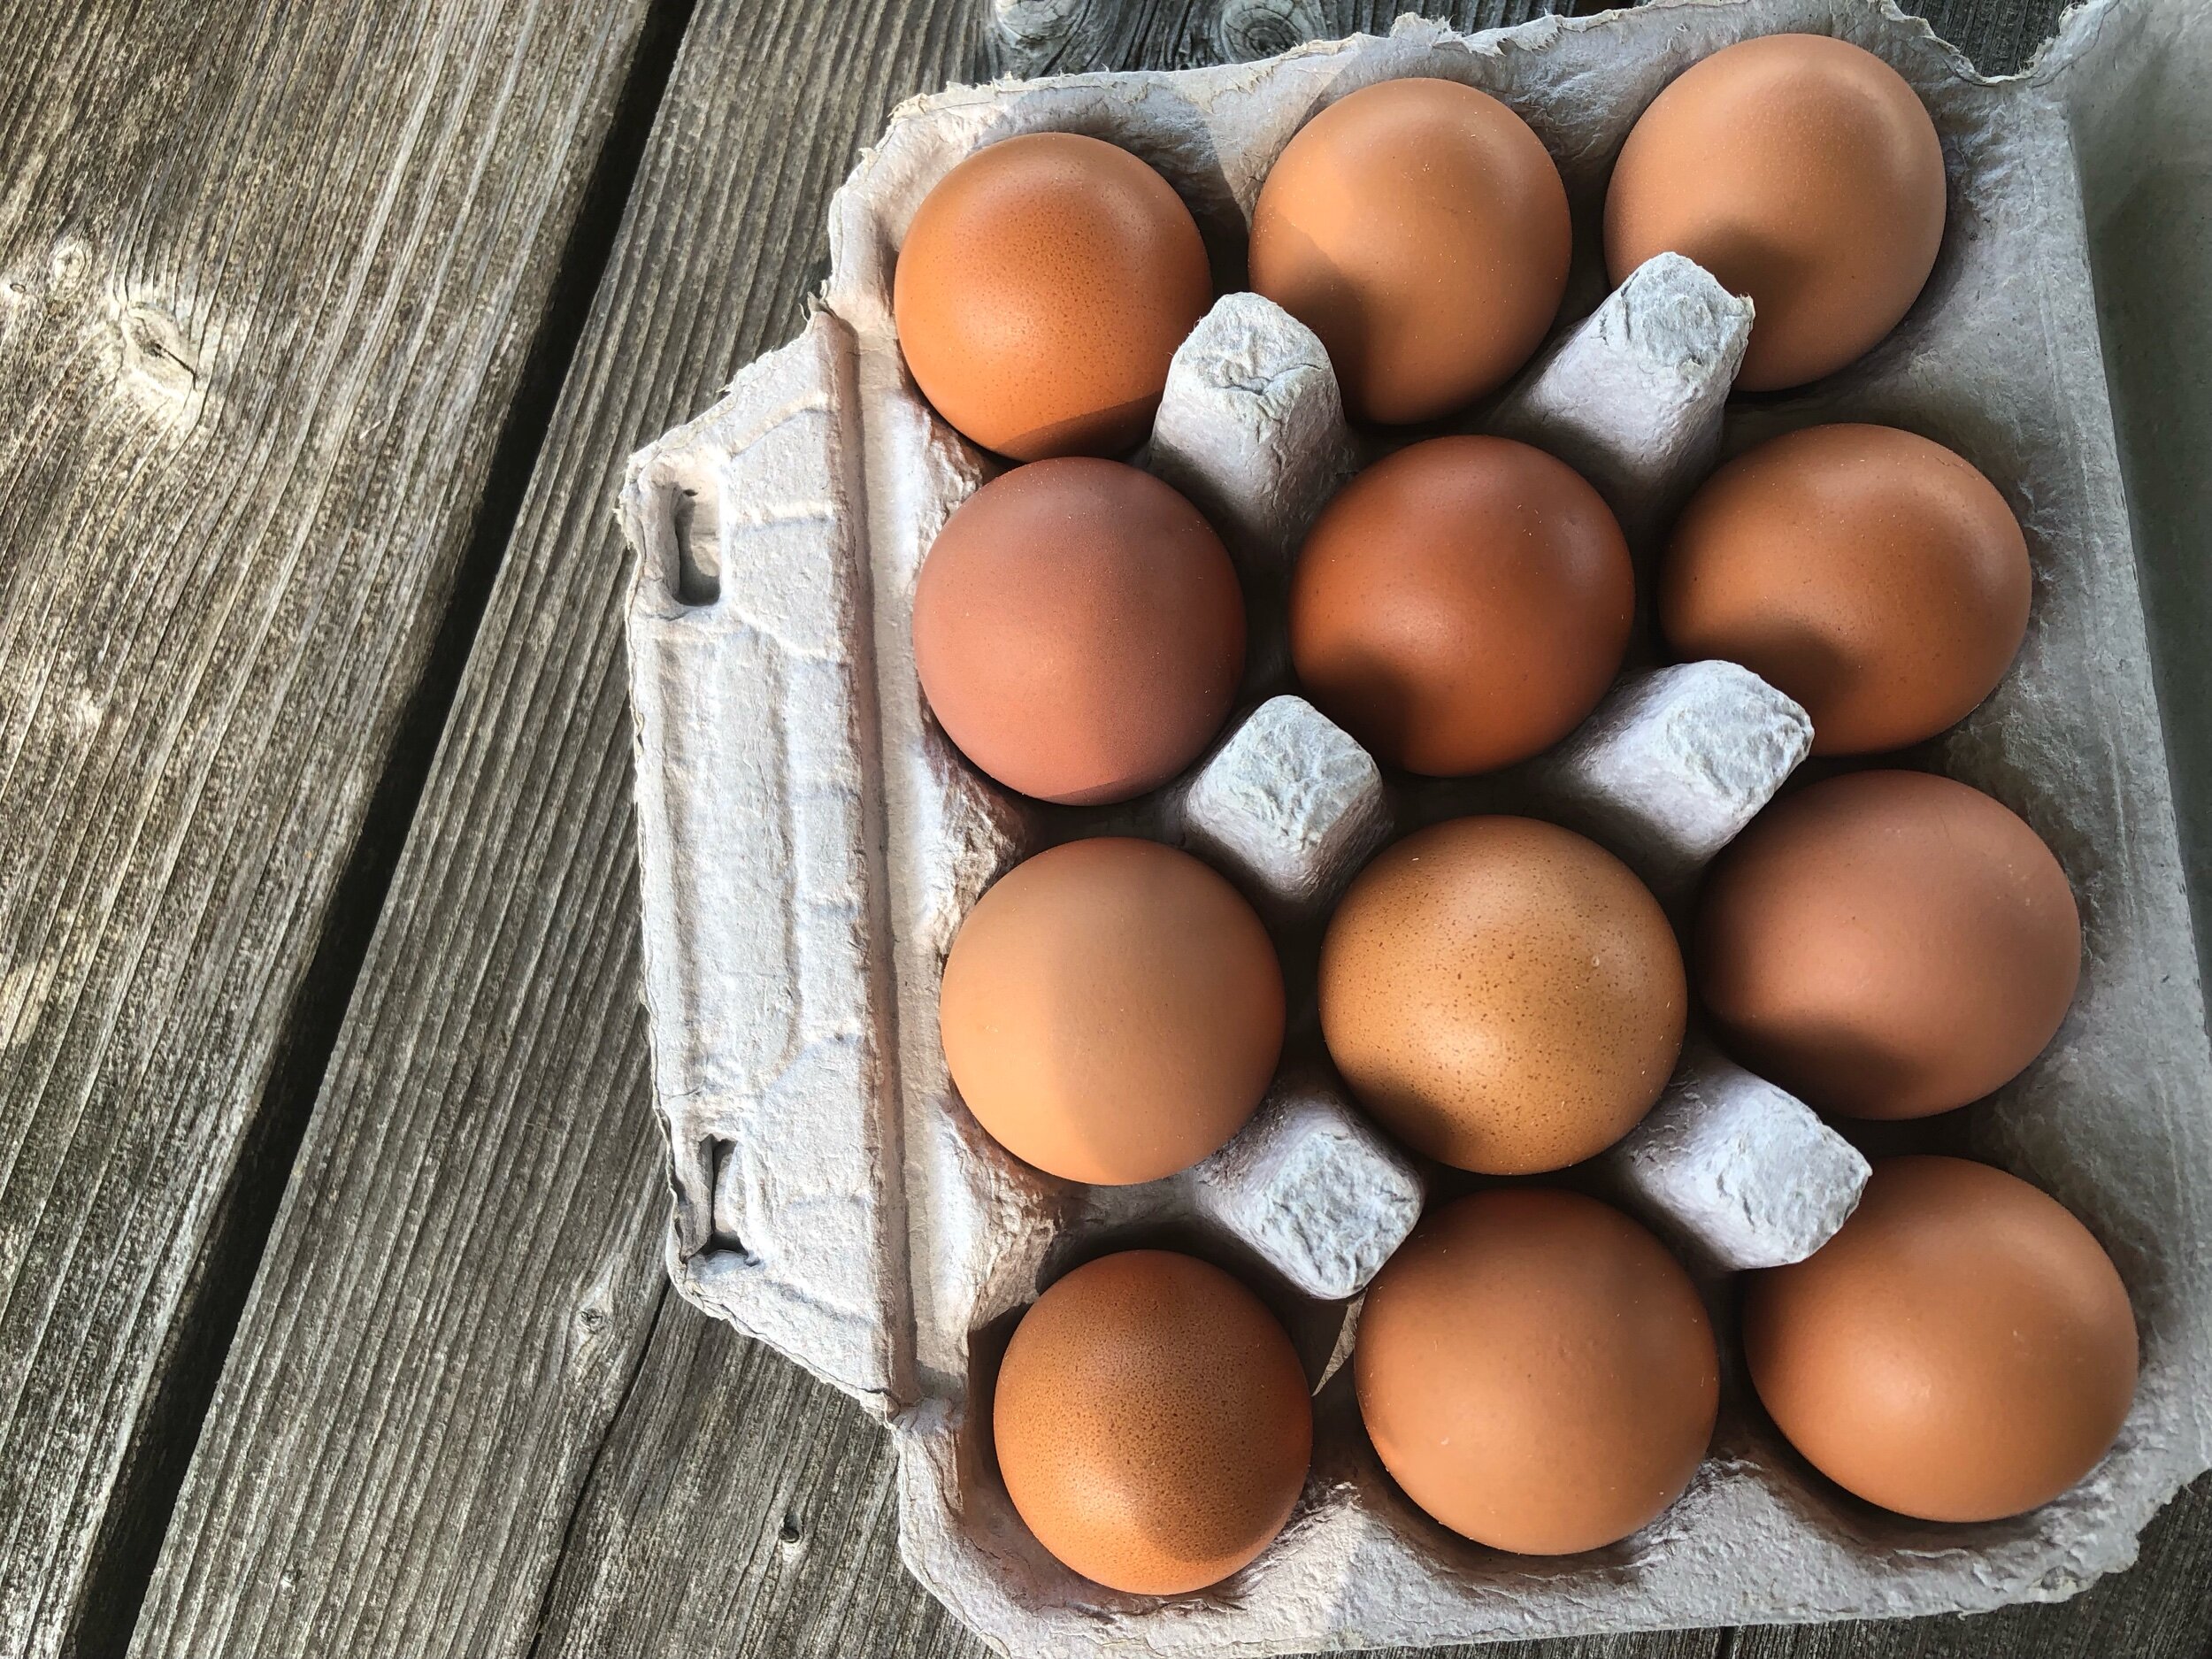
Eggs from pasture-raised hens are packed with nutrients!

Eggs from pasture-raised hens are packed with nutrients!

Double double-yolkers!

Double double-yolkers!

The Chickens of Maplebrook Farmstead:

  • All of our chickens are the same breed, Red Sex-Link, which are a hybrid cross between a Rhode Island Red rooster and a White Leghorn hen. They are called sex-links because their gender is easily determined at birth by their coloring. Males are born with white fluff while females are red.

  • We love the Red Sex-Links because they have very friendly temperaments and are phenomenal layers. They lay beautiful brown eggs year round (about 1 egg per chicken per day!), even keeping up in the wintertime without artificial lighting in the coop.

  • It is typically said that farm-fresh eggs from pastured poultry will have a deep orange-y yolk, however this can also be breed dependent. Despite the fact that our chickens get rotated on green pastures weekly, the Red Sex-Links tend to lay eggs with a vibrant yellow yolk.

  • We buy all of our chickens as ready-to-lay pullets, when they’re about 17 weeks old. After doing this for the past three years, I will never go back to raising chickens from day-old chicks ever again. Our pullets come from Moyer’s Hatchery in Pennsylvania, who do a phenomenal job raising them up to teenage-hood. When we get them, they’re only about two weeks away from starting to lay, which is a much more economical and time-efficient process for us.

  • Contrary to popular belief, there does not need to be a rooster in a flock in order for the hens to lay eggs. If there is no rooster in a flock, it just means that the eggs will never be fertilized, and thus never turn into chicks. We don’t have any roosters here, and we like it that way!

  • Chickens will usually lay their eggs in the early morning. I collect eggs twice a day- once around 8 or 9am, and once again in the early afternoon.

Adjustments.jpeg
Adjustments.jpeg

Handling and Storage Tips:

  • Eggs have a natural film coating the shell called the “bloom” that preserves bacteria from penetrating into it. When eggs are washed, it removes this film. That is why it is best to refrigerate eggs that have been cleaned. If you don’t wash eggs, they can be stored at room temperature for weeks.

  • At our farm, I wash only the dirty eggs (using just lukewarm water). Because I don’t differentiate between eggs that have been washed and those that haven’t, I refrigerate all of our eggs once they’ve been packaged. Once eggs have been refrigerated, they need to continue to be stored that way.

  • Eggs should always be stored “upside-down,” with the pointy end of the egg on the bottom. The round, fat end should be at the top. This is because there is an air bubble at the round end and keeping it at the top will keep the egg fresh longer.

  • How to tell if an egg is still good: the float test! Fill a glass or small container with water. Put the egg in the water. If it sinks, especially on its side, it’s fresh! If it floats, it’s rotten and should not be eaten! If it’s somewhere in between, use caution.

  • Eggs will typically stay good for at least two months. On our cartons, we have a “sell-by” date that is marked for one month after the eggs have been laid. They are easily good for a month after that sell-by date, usually even longer.


Every now and again, a chicken will lay a shell-less egg. It lacks a hard outer shell, but still contains the inner soft shell, making it squishy. A very rare and cool find!


Egg Carton Returns:

  • I get asked all the time if we take our egg cartons back to reuse them, and the answer is yes!! Cartons cost about 13 cents each, which adds up when we’re getting 20 dozen eggs per day from our chickens!

  • We are happy to reuse CLEAN, NON-RIPPED cartons. There is a return box located in the farm stand under the money box.

  • We can only reuse our own cartons, the ones that have 3x4 cells and our labels on them. We can’t use store-bought cartons or ones with other farm labels.

  • THANK YOU! We appreciate the extra effort of setting your cartons aside to save for us!

Adjustments.jpeg
IMG_3570.jpeg

RECIPE: Pickled Eggs

I promise you- pickled eggs are better than they sound! This is a perfect recipe to use up small eggs, whether they be from chickens who are just starting to lay (known as pullet eggs) or from another type of poultry, such as guinea hens or quail who typically lay a smaller egg in general.

pickled egg.jpg
pickled eggs.jpg

Beet Pickled Eggs

  • 1 15 oz can of sliced beets

  • 1 C apple cider vinegar

  • 1/4 onion, sliced

  • 1/3 C sugar

  • 3 cardamom pods

  • 1 star anise

  • 6 hard boiled eggs, peeled

Jalapeno Pickled Eggs

  • 3/4 C apple cider vinegar

  • 3/4 C water

  • 1/4 onion, sliced

  • 1/2 C plus 1 Tbsp sugar

  • 6 cloves

  • 2 jalapeno peppers, sliced in half the long way, seeds removed

  • 1 tsp cumin seeds

  • 1 bay leaf

  • 1/2 tsp oregano

  • 1 garlic clove, peeled

  • 6 hard boiled eggs, peeled

Directions:

  1. Place the hard boiled eggs at the bottom of a quart-sized mason jar.

  2. In a medium pan, add the vinegar, canned beets (including juice), onion, sugar, and spices (and jalapenos and water if using that recipe).

  3. Bring to a boil and cook uncovered until the sugar has dissolved and the onions are translucent (about 5 minutes).

  4. Remove from heat and let cool for 5 minutes.

  5. Pour mixture over eggs. Seal the jar and store in the fridge for up to a month.

  6. The eggs will be ready to eat after a couple days. The longer you leave them to marinate in pickling juices, the stronger their flavor.

RECIPE: Broccoli and Mushroom Quiche

Quiche is a great meal any time of day, and can be easily adapted with many ingredients you may have in your home. This recipe includes broccoli and mushrooms, but those can easily be substituted for other veggies or meats.

Ingredients:

Pie Crust:

  • 1 1/2 C Flour

  • 3/4 tsp salt

  • 1/2 C (hard) Crisco shortening

  • A couple tablespoons of water

Filling:

  • Small head of broccoli

  • 6-8 mushrooms, sliced

  • 1/2 C shredded cheese

  • 6 eggs

  • 1 C milk

  • Salt and Pepper

Directions:

  1. To make the crust, begin by mixing together flour and salt.

  2. Cut in 1/4 cup of the shortening until the mixture has a “fine crumb” consistency.

  3. Cut it another 1/4 cup of shortening until it has a “course crumb” consistency.

  4. Add a small amount of water- somewhere around 2 tablespoons- until you can form dough into a nice smooth ball.

  5. Roll it out and lay over a 9.5 inch pie pan.

    ** The secret to success with a homemade crust is to not over-mix when adding the shortening as well as the water. **

  6. Steam broccoli and saute mushrooms as you would with any meal.

  7. Place cooked broccoli and mushrooms over the uncooked pie crust in the pan. Cover with shredded cheese.

  8. Beat together eggs and milk. Sprinkle a pinch of salt and pepper in. Pour over ingredients in the pie crust.

Bake at 350 degrees for 35-45 minutes.

5 Tips for Decorating Your Front Porch for Fall

Fall is officially here, which means flannel shirts, apple picking, and pumpkin spice everything. Here at the farm, we got into the spirit of the season a bit early this year, and put our traditional pumpkin wagon out next to the farm stand the first week of September.

Pumpkins are of course the quintessential harbinger of autumn, so I thought I’d offer you a few decoration tips as you put them out on your front porch this season…

 
Adjustments.jpeg
 

1. Skip the plastic

(This is more of a general consideration than a decorating tip, but as a steward of this Earth I feel compelled to necessitate it…)

  1. In the United States we throw away 250 million tons of trash a year. While plastic decorations make look cute and be reusable, they get used for a few years and then inevitably end up in our garbage. They sit in landfills for decades or even centuries, polluting our soil and water.
    Please please please ditch the plastic decorations and start a tradition of going all-natural. They won’t take up storage space 10 months of the year, and at the end of the season you can toss everything into your compost pile where it will feed your backyard critters for winter and later decompose into usable compost. You may even get some volunteer pumpkins that re-grow next year!

2. Color scheme

Stick with one color or mix them all. There are so many fun pumpkin varieties available these days that you could pick one color scheme, like all oranges, blues/greens, or beiges and whites. OR you can get creative and combine them all to create a vibrant reflection of the colors of Autumn.

 
Hues of blue and green. From “Martha Stewart Living” Magazine

Hues of blue and green. From “Martha Stewart Living” Magazine


2. Textures:

Varying textures give a design a more complete feeling. You can use metal, wood, or plants to create accent pieces among your pumpkins. I had an extra metal chicken waterer that I added to this display, and it blends right in for a “farmhouse” style design. Wooden signs, hay bales, corn stalks, and vibrant mums are all great accent pieces that add extra texture and life to your front porch.

 
Adjustments.jpeg
 

3. Layering

Create depth in your display by adding different sized items. Pumpkins of all different shapes and sizes are the easiest way to do this, but you can also use tables, crates, or hay bales to give your design a bit more depth.

 
Adjustments.jpeg
 

5. A Wreath:

Create a welcoming centerpiece to the front of your home with an all-natural wreath or swag. I bundled together this ornamental corn with baling twine for a quick 3-minute design, but the internet is abound with ideas for DIY homemade autumn wreaths. Use grapevine, pine cones, or corn husks (the possibilities are endless) to create a piece that is unique to you and your family.

 
Adjustments.jpeg
 

Many thanks to my friends Emelia and Ally who let me takeover their front porch for a couple hours to create this display.
Decorating your home is one of the best ways to get into the spirit of a new season and create a warm welcome for family and guests. Use these tips to create a space that is uniquely yours and good for the planet too.
🍂 Happy fall! 🍁

RECIPE: Chicken Poblano Chowder

Chicken Poblano Chowder

Ingredients:

  • 2 Tbsp olive oil

  • 1 cup diced onion

  • 3 Tbsp flour

  • 5 poblano peppers (or similarly mild chile peppers)

  • 2 gloves garlic, minced

  • 1 tsp ground cumin

  • 1 tsp sea salt

  • 1/4 tsp black pepper

  • 4 cups chicken stock

  • 2 chicken breasts, cut into 1/2 inch pieces (roughly 4 cups)

  • 2 cups shredded cheddar cheese

  • 3/4 cups heavy cream

  • Fresh cilantro (for garnish, optional)

Directions:

  1. In a dutch oven, heat the olive oil and saute the union until tender over medium heat.

  2. Add flour, peppers, garlic, cumin, salt, and pepper. Cook for 5 minutes, stirring frequently.

  3. Add stock and chicken. Bring to a boil and simmer for 15 minutes, or until the chicken is completely cooked.

  4. Reduce the heat to low and stir in the cheese and cream. Cook until heated through.

  5. Taste and adjust the salt if needed. Garnish with fresh cilantro, shredded cheese, and a side of tortilla chips if desired.

TWO More Goat Kids Born Today!

I shared this photo on Instagram this morning of Whitey’s udder maxed out on volume. “Bagging Up,” as we say in the dairy world, it’s a telltale sign that an pregnant animal is nearing her due-date. Little did I know that Whitey would go into labor just hours later!

 
IMG_1544.jpeg
 

I left the farm for a few hours this morning to pick up supplies for an upcoming project. When I got back, the door to the goat barn was wide open and only one goat left inside… 11 goats broke the latch of the door and went on a pillaging rampage of our feed supply in a separate barn.. Whitey stayed behind in solitude, busy nesting for the impending arrival of her kids. With the help of a friend, I corralled the vagabond herd back into the barn and separated Whitey so she could have uninterrupted focus during labor. Within 20 minutes, we had two new baby goats on the farm.

Both kids are doing great, and Whitey is doing a great job protecting and nursing thus far. I am endlessly grateful for smooth births with strong mamas and healthy kids.

Last year I started the tradition of having specific theme names for all of my goat families. There are the Disney princesses, the fruits, and the Massachusetts town names families. Whitey didn’t have babies last year, so I get to start a new theme with these kids. Per the suggestion of my farm-friend, Floyd, Whitey’s offspring will be named after constellations.

So without further adieu, I introduce you to Orion and Cassiopeia.

Adjustments.jpeg
Adjustments.jpeg
Adjustments.jpeg

Photos: Day 1 of the First Goat Kids of 2020

Breakfast with goats did not go as planned yesterday. After Beauty finished her morning ration, she made a beeline up the driveway at a shockingly fast rate for a pregnant goat. Goats are herd animals by nature, and thus I rarely see them go anywhere by themselves. I figured she was heading for the field across the street, as it has early green grass- one of the goats’ very favorite treats in spring.
I got the rest of the goats settled back in the barn before chasing Beauty down. I couldn’t find her anywhere- not in the usual spot across the street, not in the grassy island by the farm stand, nor rummaging through feed bins in the barn.


I finally made my way to the beehives to look for her in the higher pastures, and sure enough she was already half way up the hill at that point. This is when I knew we had an impending labor on our hands. I called out to her, and she gave me a weak “maaa” in return before continuing on her way.

It was the most beautiful March day one could hope for in New England. Blue skies, bright sun, and temps in the 50’s. So I let her go on her way, knowing that she knew exactly what she needed in that moment.

I followed her to a pine tree where she scratched at the earth (nesting) to make a suitable spot to welcome babies to this world. I went home to eat lunch and gather supplies and returned 45 minutes later to 2 new tiny goats! She had a girl and a boy, both of whom were born healthy, active, and ready to suckle minutes after coming from the womb. Because Beauty’s kids are all named after Disney Princesses, these two will are named Ariel and Charming. Ariel is the darker colored one, and Charming is mostly white with streaks of black.

The moments of that day were magical, aw-inspiring, and so humbling. If you ever feel the need to experience the bare essential beauty of the world, watch an animal give birth. They stay calm, listen to their bodies, and get the job done with little fanfare.

I imagine that a gallery of cute baby goat pictures is exactly what we all need in our lives right now, so enjoy these snapshots of the very first hours of baby goat life.

RECIPE: Immunity Boosting Bites

I love to create these herbal immune-boosting bites every spring to give my body an extra dose of power during the worst of tick season. This year, due to the world-wide outbreak of Coronavirus, it is even more vital to have a strong immune system and healthy body that is prepared to fight for itself. This recipe is SO SIMPLE, and a perfect opportunity to teach kids about the power of herbs and ways to keep their own bodies healthy.

All of the herbs listed in the recipe should be used in powder form. I prefer to buy all of my powered herbs through Mountain Rose Herbs.

RECIPE

  • 1/2 Cup Astragalus Root Powder

  • 1/4 Cup Eleuthero Root Powder

  • 1/4 Cup Ashwagandha Root Powder

  • 1 Tbsp Turmeric Powder

  • 1 Tbsp Ginger Root Powder + another couple Tbsp to roll balls in

  • 3/4 Cup Sunflower Butter or Tahini

  • 1/2 cup raw, local Honey

Combine wet and dry ingredients separately, then mix together until the dough is a moist consistency. Form into ~ 1 inch balls and roll in a light coating of ginger powder.

Store in the fridge and eat 2/day (They are so tasty it will be a challenge to limit yourself to just two!).

herbal+immunity+bites.jpg

RECIPES: Butternut Bisque and Glazed Brussels Sprouts

Butternut Squash Bisque & Glazed Brussels Sprouts

These two dishes are a perfect addition to your Thanksgiving table, or a simple heart-warming meal on a cold winter’s day.

75439483_151517802832795_6902183152442146816_o.jpg

Butternut Squash Bisque

Ingredients:

  • 1 large butternut squash (or any other variety will do- I personally like to use two delicatas, which have tremendous flavor)

  • 2 tbsp olive oil

  • 1 medium onion

  • 2 carrots, diced

  • 2 cups broth (I prefer to use my own homemade chicken broth, but vegetable broth works as well)

  • 1/2 tsp sea salt

  • 1/4 tsp black pepper

  • 1/8 tsp ground nutmeg (This is the essential element of this meal)

  • 1/2 cup milk or cream

** Remember! These ingredients are just a guideline for your culinary imagination.

Add as much or as little as you’d like and discover exactly what makes the flavor taste amazing to you. **

Directions:

  1. Preheat the oven to 350 degrees.

  2. Cut the squash in half, remove seeds, and place face-down in a baking dish with about 1/4 inch of water at the bottom.

  3. Cook the squash for ~45 minutes - 1 hour, until it is slightly brown on the top and you can easily slide a knife into the flesh.

  4. Once cool to touch, scoop out the squash with a spoon and compost the skin.

  5. In a medium-size pot, add olive over medium heat. Add onions, carrots, salt, pepper, and nutmeg. Saute until the onions are tender.

  6. Add squash and cook for 5 more minutes.

  7. Add broth and bring to a boil. Once boiling, reduce heat to low and simmer until the carrots are tender (8-10 mins).

  8. Use a blender (I prefer an immersion blender) to puree the mixture until smooth.

  9. Return to a pot on the stove and heat on medium. Add the milk or cream.

  10. Continue to heat until bisque has reached an agreeable eating temperature.

  11. Add salt and pepper to taste.

  12. For garnish, drizzle 1-2 tbsp of cream and/or a dash of nutmeg to your dish.

  13. Enjoy!


Glazed Brussels Sprouts

I will admit that I, at 24 years old, had never eaten Brussels sprouts in my whole life until I tried this recipe. And now I can’t get enough of them! I thought that a recipe so good should not be kept a secret.

Ingredients:

  • 1 pound Brussels sprouts, sliced in half or quartered if large

  • 3.5 tbsp olive oil

  • 3 cloves garlic, minced

  • 1/3 cup soy sauce

  • 3 tbsp REAL maple syrup

  • 3 tbsp apple cider vinegar

  • 2 tbsp tahini (I didn’t have this, so I used sunflower butter)

  • 2 tsp sriracha hot sauce (I am a wuss for hot flavor, so I left this out)

Directions:

  1. Make the sauce first. Heat 2 tbsp of oil in a large skillet over medium heat.

  2. Add the garlic and cook, stirring until fragrant (~ 2 mins).

  3. Add the soy sauce, maple syrup, vinegar, tahini, and sriracha. Cook until the mixture is thick and smooth.

  4. Pour mixture into a jar or bowl and set aside.

  5. Using the same skillet, heat 1.5 tbsp oil over medium heat. Add Brussels sprouts and cook until golden brown and slightly crisp on all sides (~ 8 mins)

  6. Stir in half of the sauce and continue to cook for another 2-3 mins, stirring often. Add in more sauce if need be. You want a nice coating of glaze. Don’t let your Brussels sprouts swim in the sauce!

  7. Serve warm or at room temp with optional sauce on the side.

  8. Store any extra sauce in an airtight container in the fridge for up to 5 days.

Let me know what kinds of personal amendments you make to these recipes, and how your meal comes out!

Bon Appétit!

September 2019 News

CLICK HERE for the 4th publication of our farm newsletter, The Grazer. This month we’re going with a “B” theme… bovines, bouquets, butterflies, and bees. And if you read on long enough, you’ll come across a discount code to use in our online store when ordering whole chicken.

70234454_131028188215090_6819401798160220160_o.jpg